Getting started — where to find everything
Your map to Event Design App: where to sign in, where to learn the tools, where to get help, and where new features are announced.
Event Design App is browser-based 3D event design software for rental companies, designers, planners and venues. There is nothing to install — you sign in, create a project, and build a layout in the editor. This page is the map: where to log in, where to learn, and where to get help.
Start here: the Video Academy
The single fastest way to learn the tool is to watch someone build with it.
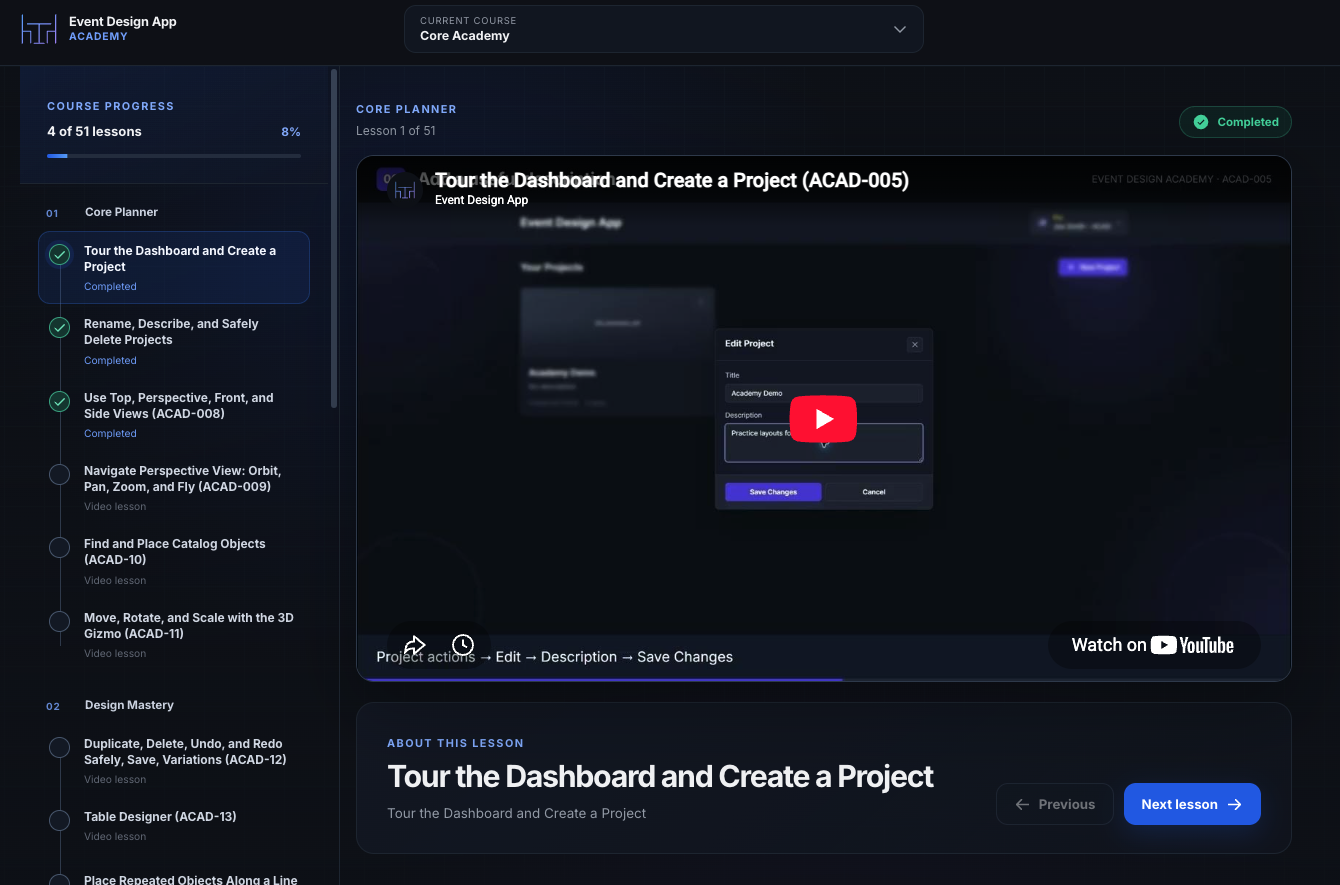
50+ short lessons, each a few minutes, in the order you'd actually use them — your first project, moving objects, walls, tents, staging, table settings, AI renders, and client-ready exports. It tracks what you've finished, so you can stop and pick up where you left off.
Most people who get stuck in their first week never opened it. Start with lesson 1 — it's under five minutes.
💡 Watch in one tab, build in another. Following along as you watch is the fastest way for it to stick.
Where to sign in or sign up
I want to | Go here |
|---|---|
Log in to an existing account | |
Sign up for a new account |
You can register with an email and password, or use Google sign-in. Registering signs you in automatically and takes you straight to a short onboarding. There is a Free plan, so you can start without paying.
See Create an account and sign in and Complete onboarding.
Where to get help
Four places, each good for something different:
Where | Best for | Link |
|---|---|---|
Video Academy | Learning a tool properly, start to finish | |
Help Center | Looking up one specific thing, written step by step | |
In-app chat | You're stuck right now, mid-design | The chat bubble in the bottom corner of the app |
YouTube channel | Watching walkthroughs outside the app, or sharing one with a colleague |
The in-app chat answers instantly, day or night, from these same help articles. If it can't answer, it passes you to a person.
Follow for updates
New features ship often, and they show up on social first — new tools, real client renders, and design tips.
Instagram — @eventdesignapp
Facebook — Event Design App
LinkedIn — Event Design App
YouTube — @EventDesignApp
How the app is organized
Three levels, and they trip people up in the same order every time:
Project — the folder for one event. A wedding, a corporate gala, a venue you quote often.
Plan — one layout inside that project. A project can hold several: ceremony, dinner, a plan B for rain.
Editor — where you actually build the plan. Catalog items, tables, walls, floor plans, lighting, renders.
⚠ Creating a project does not create a layout. A new project opens on an empty Plans page reading No plans yet. Choose Create First Plan to start designing. This is the most common "nothing happened" moment for new users.
A typical first session
Sign in and finish onboarding.
Create a project from the dashboard, then create a plan inside it.
In the editor, place a few catalog items — a table, some chairs — and practice moving them.
Switch between top view and perspective view to see the layout in 3D.
Save the plan, then reopen it to confirm it saved.
That's the whole loop. Everything else — walls, tents, floor plans, AI renders, client exports — builds on it.
When something is locked
If a tool or a catalog item is greyed out or marked Available on Plus or Pro, it needs a paid plan. Open Subscription from the account menu to compare plans and credits. If you belong to a company workspace, billing sits with your company admins and you won't see Subscription at all.
Frequently asked questions
Where do I learn how to use the software?
The Video Academy at academy.eventdesignapp.com has 50+ short lessons covering every tool in the order you'd use them, and it tracks your progress. The Help Center has written step-by-step guides for the same features, and the in-app chat bubble answers specific questions while you work.
Do I need to install anything?
No. Event Design App runs entirely in your web browser — there is nothing to download. Sign in with email and password or with Google, finish a short onboarding once, and work from the dashboard and editor. Your projects and plans are stored in your account and open again on any computer.
Is there a free version?
Yes. The Free plan includes the core design tools, wall drawing, staging, rendering and a starter set of 3D models. The full model library, the AI tools and Import from Google Maps need a Plus or Pro plan. You can choose during onboarding and change it later from Subscription.
Why is my new project empty?
Creating a project only creates the folder for an event, not a layout. A new project opens on a Plans page reading No plans yet. Choose Create First Plan to start designing, then add catalog items, walls or a floor plan in the editor.
Where do I log in?
Go to go.eventdesignapp.com/login. To create an account instead, use go.eventdesignapp.com/register. Both accept email and password or Google sign-in. If you arrived from a Help Center link, signing in returns you to the page you wanted.
How do I get help while I'm designing?
Click the chat bubble in the bottom corner of the app. The assistant answers instantly from these help articles and hands you to a person if it can't. For a full walkthrough of a tool rather than a quick answer, the Video Academy is usually faster than reading.