Import and Calibrate a Floor Plan
Bring a floor plan or venue drawing into the editor and set its real-world scale with two points.
Importing a floor plan puts a drawing on the editor floor at true scale, so walls you trace and objects you place are the right size. Calibration is the step that makes that possible: you tell the app how long one known distance on the drawing really is.
Before you start
Supported files: PNG, JPG, WebP, GIF, SVG.
Maximum file size: 10 MB.
Have one known real-world measurement ready from the drawing — a dimension line, a labelled wall, a room width, or a printed scale bar.
AI Draw requires a Plus or Pro plan and uses credits. Manual Draw is free on every plan.
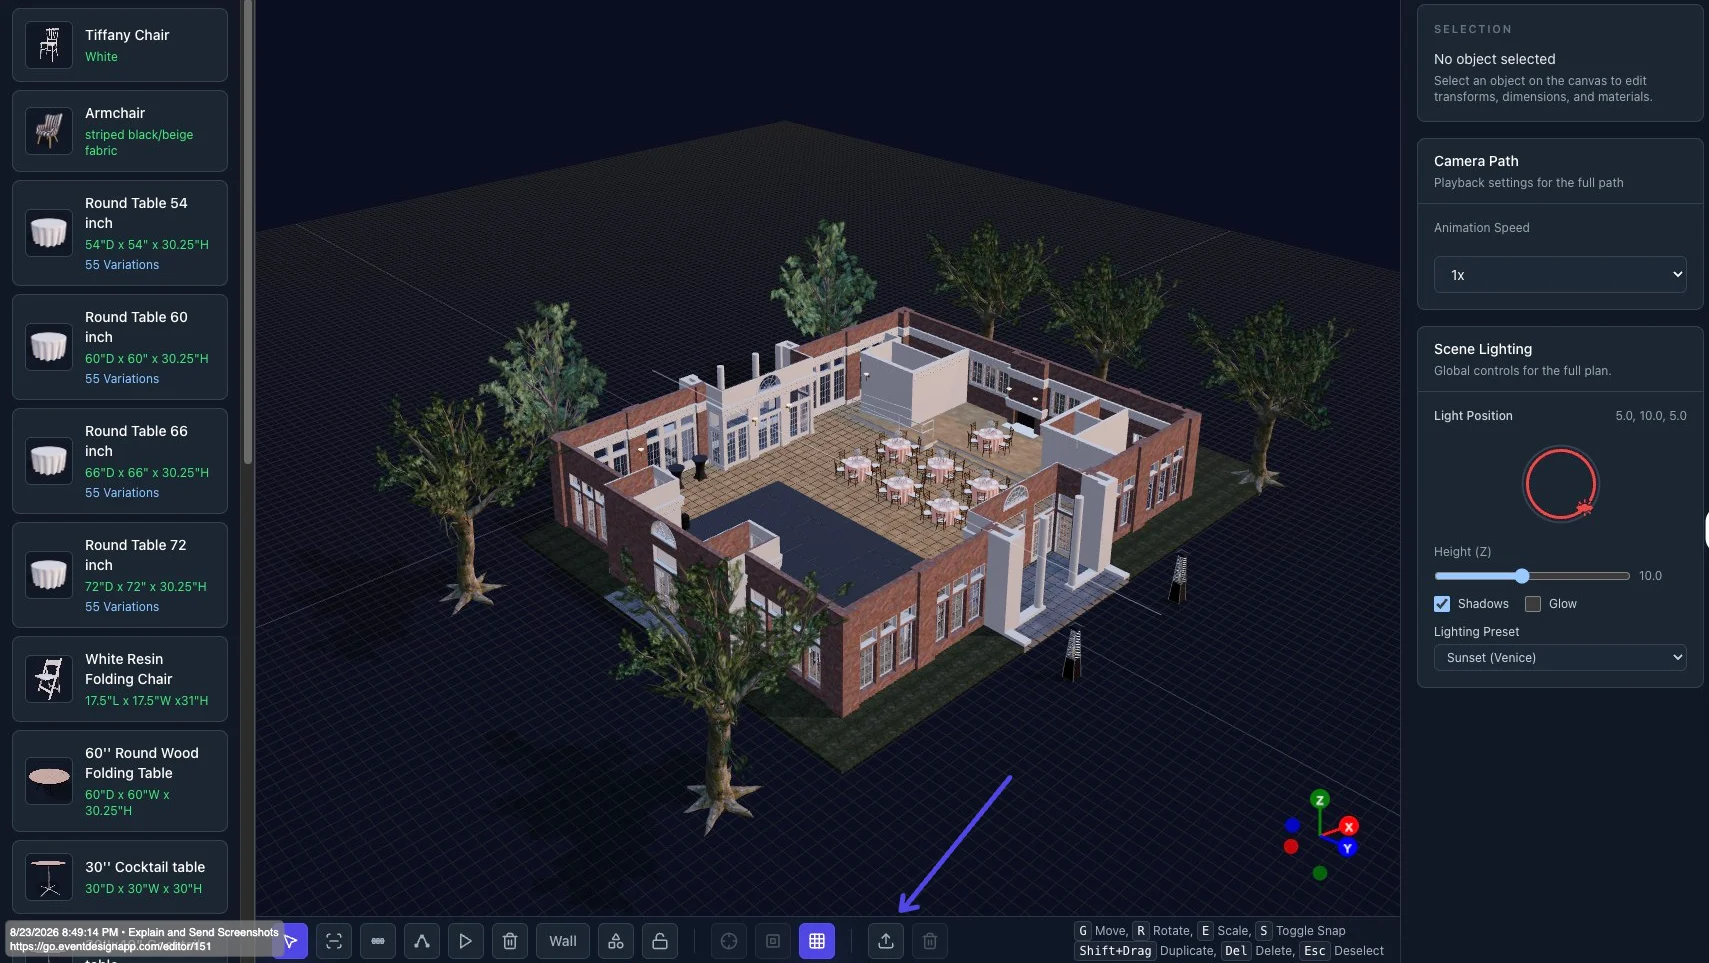
1. Open the import menu
In the bottom toolbar, click the upload icon — the arrow pointing up out of a tray.
2. Choose Import Floor Plan
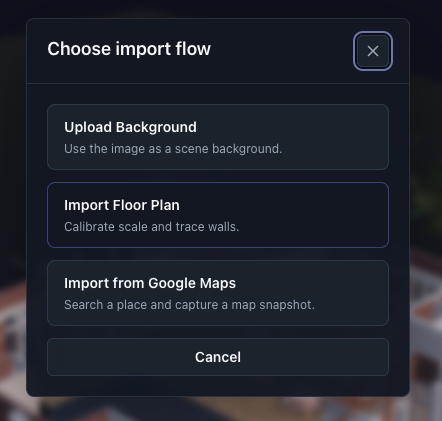
In the Choose import flow window, click Import Floor Plan ("Calibrate scale and trace walls").
3. Upload the drawing and check the preview
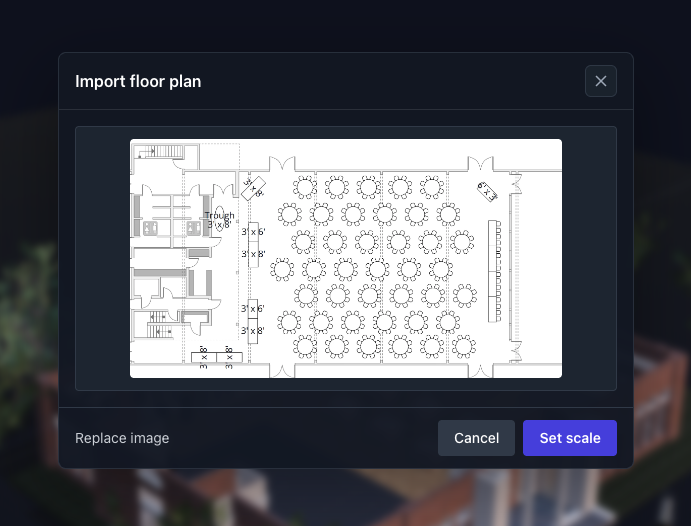
Pick your file. The Import floor plan window shows a preview. Wrong file? Click Replace image. Looks right? Click Set scale.
4. Set the scale with two points
Click one end of a distance you know on the drawing. A blue dot appears.
Click the other end. A blue line connects the dots and Selected length shows the pixel distance.
Type that distance into Real distance and pick the unit (m, cm, ft, in).
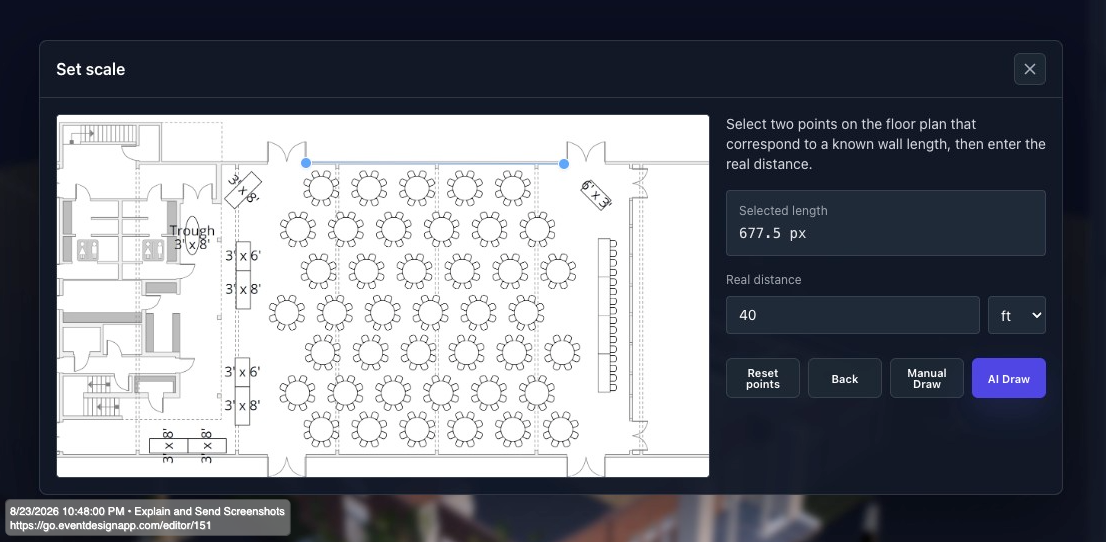
Tips for an accurate result: use the longest measurement you are confident about, since calibrating off a short segment multiplies any click error across the whole plan. A dimension line or printed scale bar is the most reliable choice. Clicking a third time starts the measurement over from a new first point, and Reset points clears both.
5. Choose how to create the walls
Manual Draw and AI Draw stay greyed out until you have placed two points and entered a distance greater than zero.
Manual Draw places the calibrated plan into the scene and switches you to Top view so you can trace the walls yourself. Free on every plan.
AI Draw sends the calibrated plan for automatic wall tracing. Requires Plus or Pro and uses credits. A status panel shows progress while it runs. Raster images only — SVG files are rejected here, so re-export as PNG or JPG to use AI Draw.
6. Trace your walls
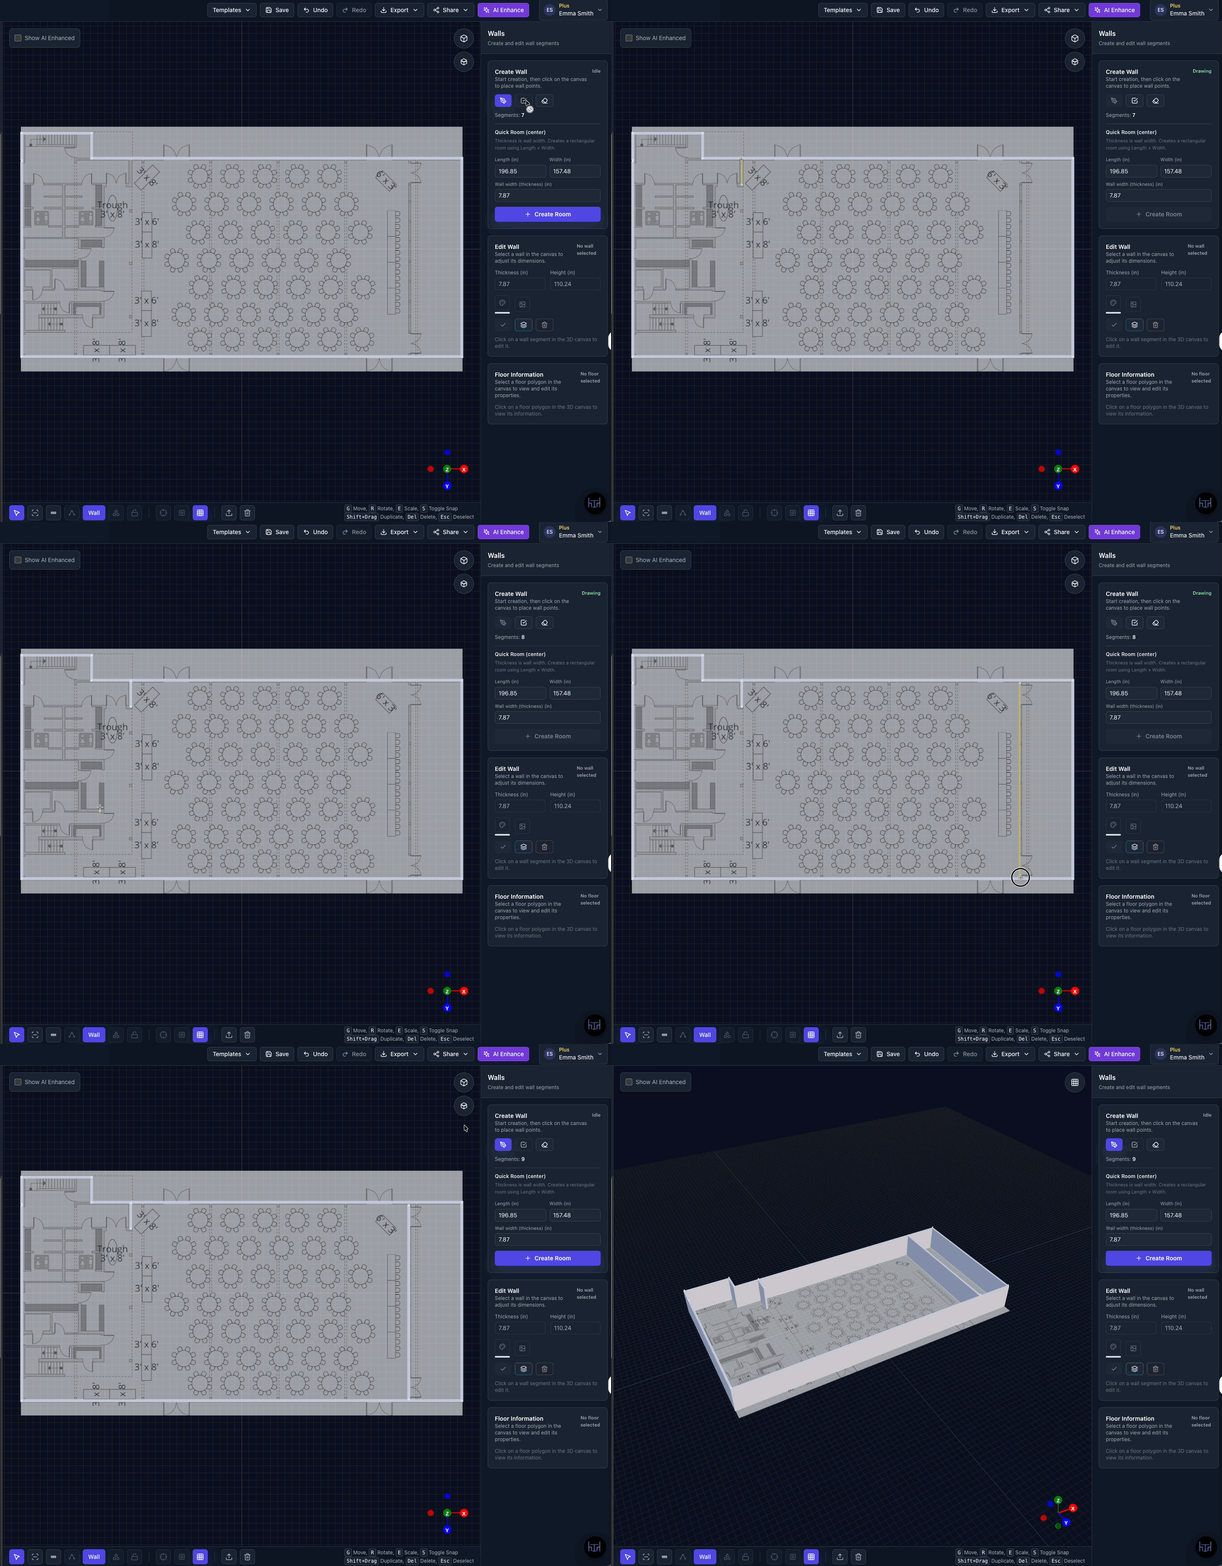
After Manual Draw, the drawing appears flat on the editor floor, dimmed, centered, and locked so you cannot move it or select it by accident. To build walls over it:
Click Wall in the bottom toolbar. The right panel opens on Create Wall.
Click the pen icon (Start creating).
Click along the walls on the canvas to place points.
Click the check icon (Finish drawing) or right click when a run is complete.
Replace or remove the floor plan
Click the trash icon at the end of the bottom toolbar and choose Remove Floor Plan, then confirm. This deletes the uploaded file too. To swap in a corrected drawing, remove the old one and run the import again — scale is stored per image, so a new drawing needs a new calibration.
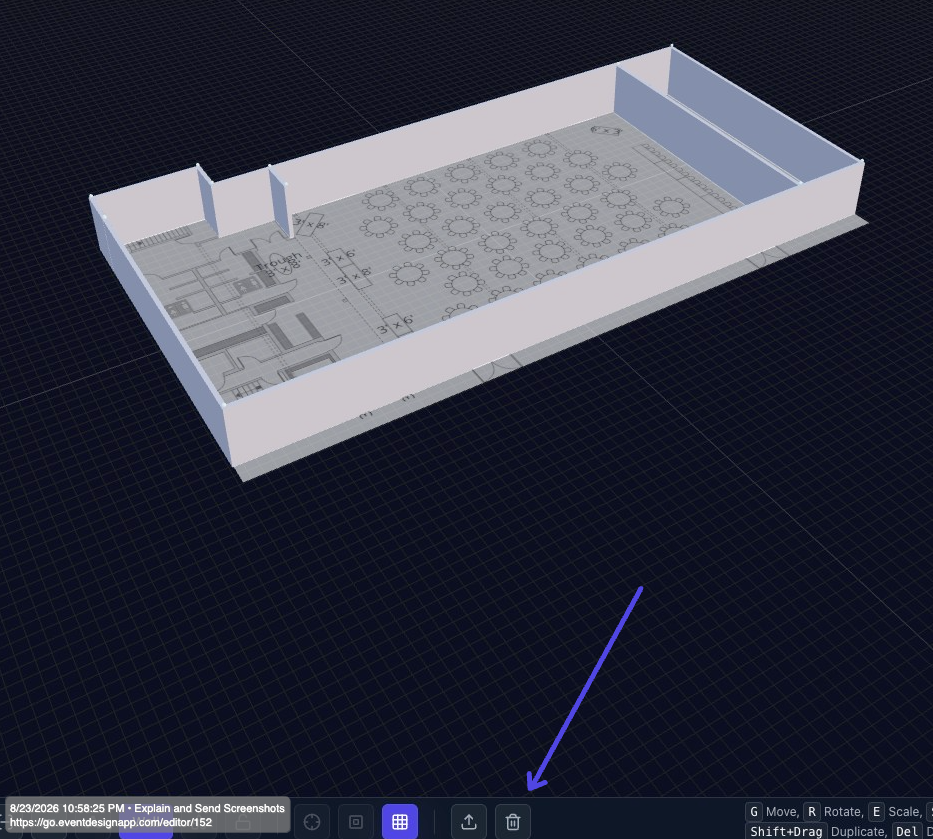
Tips for productivity: you can keep the floor plan to server as a guide when placing tables, chairs and other items onto your design and remove it after.
Troubleshooting
Manual Draw / AI Draw are greyed out — you are missing a point or the distance. "Select two points to continue" and "Enter a valid distance" appear under the fields.
"AI Draw supports PNG, JPG, WEBP, or GIF" — your file is an SVG. Re-export it as a raster image, or use Manual Draw.
"AI could not find usable wall segments" — the drawing is too faint, too noisy, or too low-resolution. Try a cleaner export, or trace with Manual Draw.
Objects come out the wrong size — the calibration distance was off. Remove the floor plan and re-import, measuring a longer known run.
The floor plan vanished — check whether Isolate is switched on. Isolate hides the floor plan and the background until you exit it.